Sewing DIY - Pencil skirt from pants
A break from knitting for a sewing project. Some time ago, I was given cropped pants that I never wore for two reasons: 1) they were too big, and 2) I don't wear pants. I kept them, thinking that I could make a skirt out of them. The fabric was fluid, drapy, and slightly stretchy. The details on the legs of the pants could be turned into fake princess seam embellishment on a skirt.
I began by watching a number of DIY Youtube videos on how to make a skirt from pants so I could get the main idea of how to do that. Next I studied the construction of the pants to come up with a strategy. One tip: as I am far from an expert seamstress, I took detailed pictures of how the stitching was done so I could reproduce it as I was reassembling the pieces together.
I started by removing the waist band, noting that it had a seam in the middle in the back. This was a good place to reduce the size of the waist band.
Then I ripped the inner seams of the pant legs, up to the zipper in the front. I sewed the two legs together straight down from the zipper in the front, cutting out the extra fabric at the inseam.
Next I took a pencil skirt I own that fits well and folded it along the center front and center back, so I would get the shape of the behind, to create the proper curvature for the back seam of my project. At that stage, I decided to place the waist at my natural waist (the pants had been low waist). I did not sew all the way down, as I still had to decide on how long I wanted my skirt and on whether I needed a slit in the back.
Next I ripped the side seams and laid my pencil skirt flat as normal on top of my work in progress to determine the shape of the side seams. I pinned them together, checked the fit by putting the skirt on, then sewed them up. This took a few trials. I did not own a truly fitted pencil skirt and with the fabric I was working with, I was coming up with styles that looked too matronly. Little by little, I fitted it tighter to where I was satisfied and comfortable with the look.
I ripped the back seam on the waist band so it was in two pieces and sewed it on the skirt, starting at the front. Before finishing attaching the two halves in the back, I put the skirt on to check for size again, cut the unneeded bits of the waist band and attached the two halves together, reproducing the original stitching.
Last, I turned my attention to the hemline of the skirt and cut it to the desired length. I realized, too late, that I needed to make a vent slit in the back so I could walk with the skirt and not look like a Geisha. I really wanted the length to be just past the knee, as I thought it looked more classy that way.
The reason I say I realized this too late is because I had already trimmed off the extra fabric at the back seam, fabric much needed to build the vent. I had to get creative and reattach some fabric there in order to build the vent. This process was the most challenging part of the project. It took a few tutorials before I figured out how to proceed.
A final note on turning low waist pants into a natural waist skirt. If it weren't for my lack of hips, I would have had to set in a new, longer zipper. I was counting on my high waist-to-hip ratio for getting away without a zipper change. The skirt is a little difficult to pull on, but not excessively so.
 |
| Cropped pants turned pencil skirt |
 |
| The original piece of clothing. Cropped pants that could barely stay on my hips. |
I began by watching a number of DIY Youtube videos on how to make a skirt from pants so I could get the main idea of how to do that. Next I studied the construction of the pants to come up with a strategy. One tip: as I am far from an expert seamstress, I took detailed pictures of how the stitching was done so I could reproduce it as I was reassembling the pieces together.
I started by removing the waist band, noting that it had a seam in the middle in the back. This was a good place to reduce the size of the waist band.
Then I ripped the inner seams of the pant legs, up to the zipper in the front. I sewed the two legs together straight down from the zipper in the front, cutting out the extra fabric at the inseam.
Next I took a pencil skirt I own that fits well and folded it along the center front and center back, so I would get the shape of the behind, to create the proper curvature for the back seam of my project. At that stage, I decided to place the waist at my natural waist (the pants had been low waist). I did not sew all the way down, as I still had to decide on how long I wanted my skirt and on whether I needed a slit in the back.
I ripped the back seam on the waist band so it was in two pieces and sewed it on the skirt, starting at the front. Before finishing attaching the two halves in the back, I put the skirt on to check for size again, cut the unneeded bits of the waist band and attached the two halves together, reproducing the original stitching.
Last, I turned my attention to the hemline of the skirt and cut it to the desired length. I realized, too late, that I needed to make a vent slit in the back so I could walk with the skirt and not look like a Geisha. I really wanted the length to be just past the knee, as I thought it looked more classy that way.
The reason I say I realized this too late is because I had already trimmed off the extra fabric at the back seam, fabric much needed to build the vent. I had to get creative and reattach some fabric there in order to build the vent. This process was the most challenging part of the project. It took a few tutorials before I figured out how to proceed.
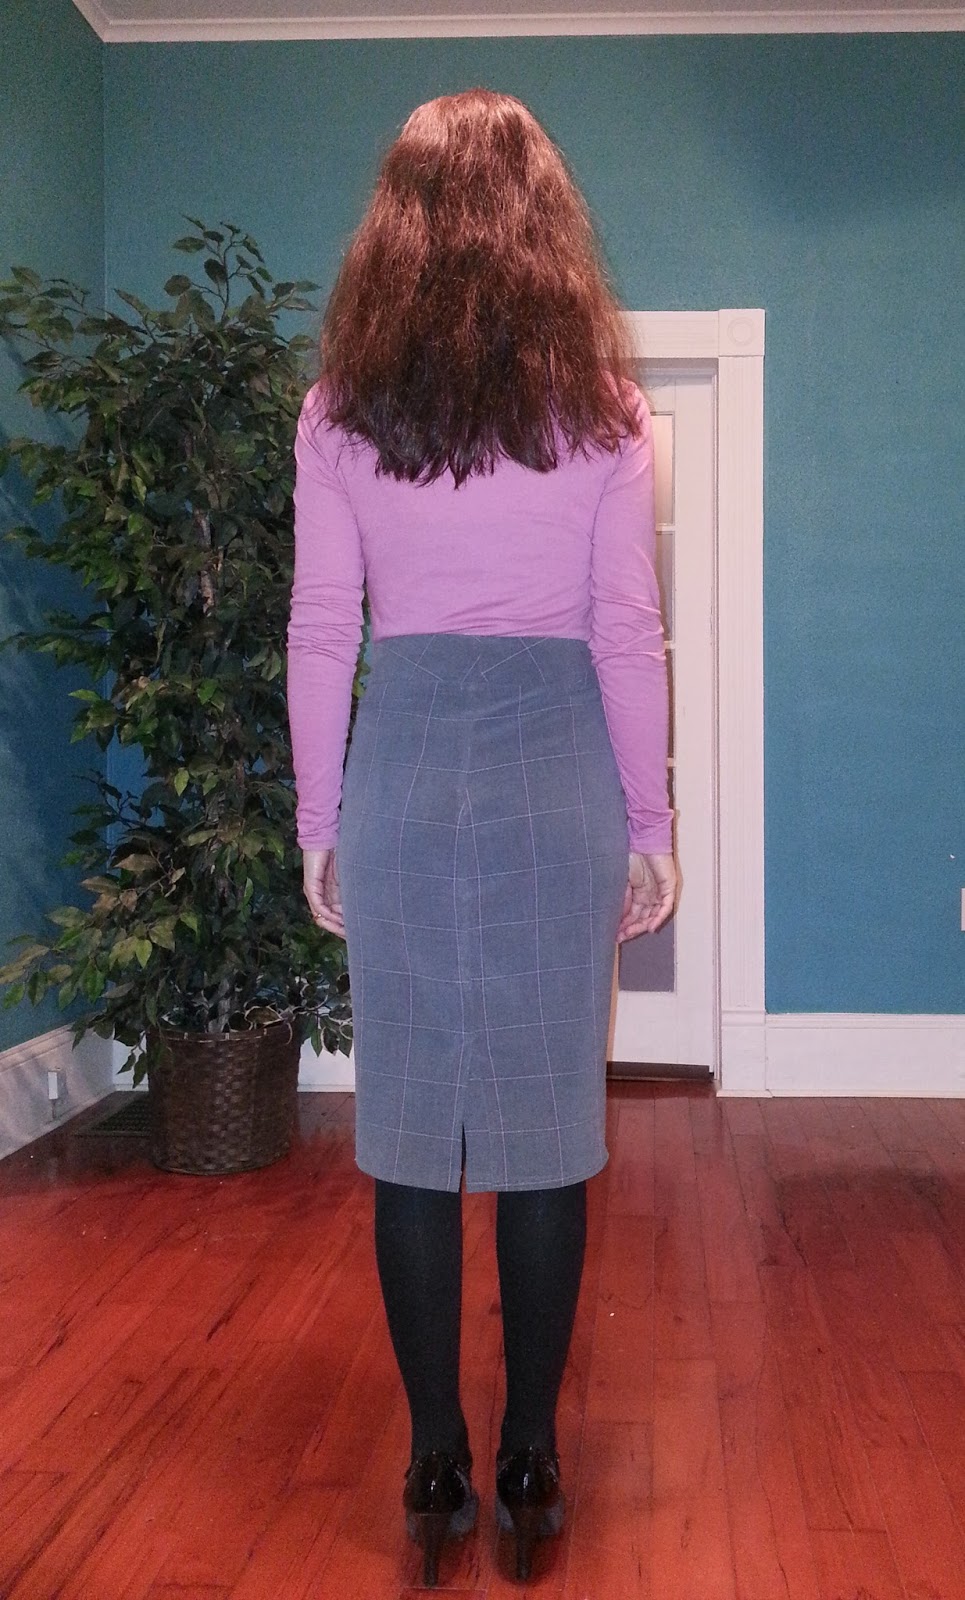 |
| Back of the skirt, with a back slit that caused much grief. |
A final note on turning low waist pants into a natural waist skirt. If it weren't for my lack of hips, I would have had to set in a new, longer zipper. I was counting on my high waist-to-hip ratio for getting away without a zipper change. The skirt is a little difficult to pull on, but not excessively so.


Comments
Post a Comment